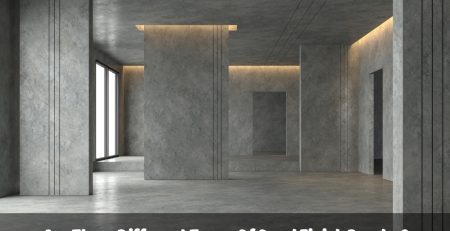
How Do You Render Exterior Wall Surfaces Effectively?
To render exterior wall surfaces isn’t just about looks—it’s a layer of defence against the elements. Done well, it keeps moisture out, improves insulation, and adds real value to your home. But when rushed or done without care, rendering can turn into a costly problem. It cracks, flakes, and in some cases, traps moisture inside the wall. That’s why every step—prep, mix, application—matters. This article explores what usually goes wrong and how to approach each stage properly for results that last, especially in tough Aussie conditions.
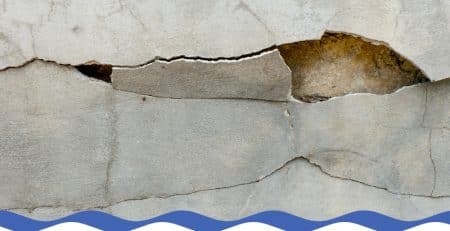
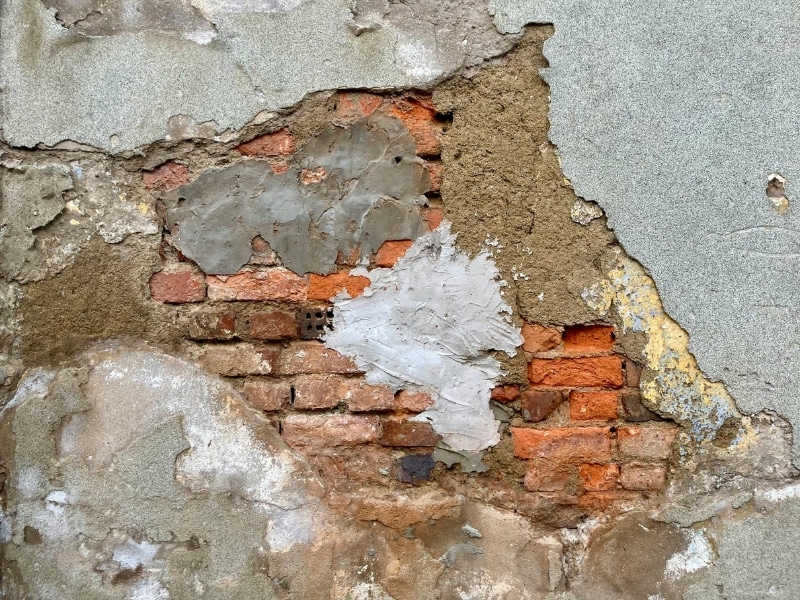
Why do cracks appear after you render the exterior wall?
Fresh render should last years—but cracks can form within weeks if things aren’t done right. It often starts small: a fine hairline here, a patch lifting there. Left unchecked, these grow into eyesores or worse, structural issues. Most cracks don’t come out of nowhere; they usually trace back to poor prep or the wrong product choices. Here are the common triggers for cracking in rendered walls:
- Inadequate surface preparation can weaken the bond, leading to tension cracks after the render sets.
- Excess water in the mix makes the render softer, which can reduce resistance to expansion and contraction.
- Drying too fast—especially in full sun—can cause early shrinkage cracks to develop.
- Using the wrong type of render for the substrate may lead to uneven adhesion and structural stress.
If cracks keep popping up after you’ve patched and painted, you might want to look into ways to stop wall cracks from coming back. There’s usually a deeper cause worth fixing
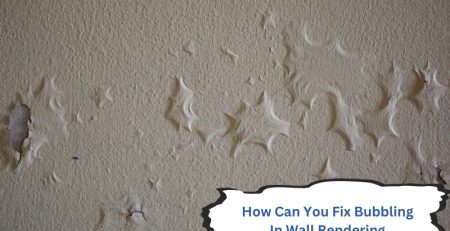
What problems arise when you render the exterior wall without prep?
You wouldn’t tile over a dirty floor—and you shouldn’t render over a grubby wall either. But plenty of folks do, especially on DIY jobs. They mix up a batch and slap it straight on. Then, weeks later, chunks fall off or it starts bubbling. That’s no coincidence—skipping prep is one of the biggest causes of early failure. Here are the common issues caused by poor wall prep:
- The render may delaminate or flake off if the base wall contains dust, mould, or oils.
- Old paint, moss, or previous coatings can block adhesion between the render and substrate.
- High wall moisture levels may lead to blistering or bubbling beneath the render.
- Uneven or damaged wall surfaces can create lumpy or cracked finishes despite good technique.
Before you even grab a trowel, know the important things about rendering walls safely. It’s not just about safety—it’s about getting the job done properly.
Could the wrong render mix cause long-term wall damage?
Absolutely. The mix is more than mud—it’s chemistry. Get it wrong, and you won’t see the problems straight away. But down the line, the wall may start to degrade, bubble, or let water in. It’s one of those things that seems minor until the damage is done. Here are the long-term issues caused by incorrect render mix:
- A rigid mix can crack when walls move, while too soft a mix may crumble or weather prematurely.
- Lime-deficient mixes are less flexible and can’t handle thermal expansion without cracking.
- Low-quality sand can make the render porous or uneven, reducing water resistance.
- Incorrect proportions affect curing, potentially trapping moisture inside walls and causing rot or efflorescence.
A lot of issues start with a bad mix—sometimes it’s just using leftover material or not checking ratios. It’s worth the time to get this part right.
What is the best method to render the exterior wall efficiently?
You don’t need to rush to be efficient—what matters is working smart. Seasoned renderers follow a rhythm: assess the wall, prep properly, apply evenly, then let it cure right. That’s how you get results that last and look good. Here are the best practices for rendering exterior walls efficiently:
- Always assess the surface and patch imperfections before starting any render application.
- Use a scratch coat for high-suction walls to promote bonding and reduce cracking.
- Maintain consistent thickness and tool technique for even, professional-looking results.
- Control environmental conditions (shade, cover) to regulate drying and avoid shrinkage issues.
For anyone starting out or tackling complex surfaces, it’s worth taking the time to explore trusted rendering methods for long-term durability. Getting the basics right from the outset can save you from major headaches later on.
How do professionals render exterior walls for the best finish?
Pros have a system. It’s not about rushing—it’s about doing each part right. They know when to apply, how thick each coat should be, and when to stop. The finish isn’t just about looks—it tells you whether the job was done right from start to end. Here are the techniques used by professionals to render for a clean finish:
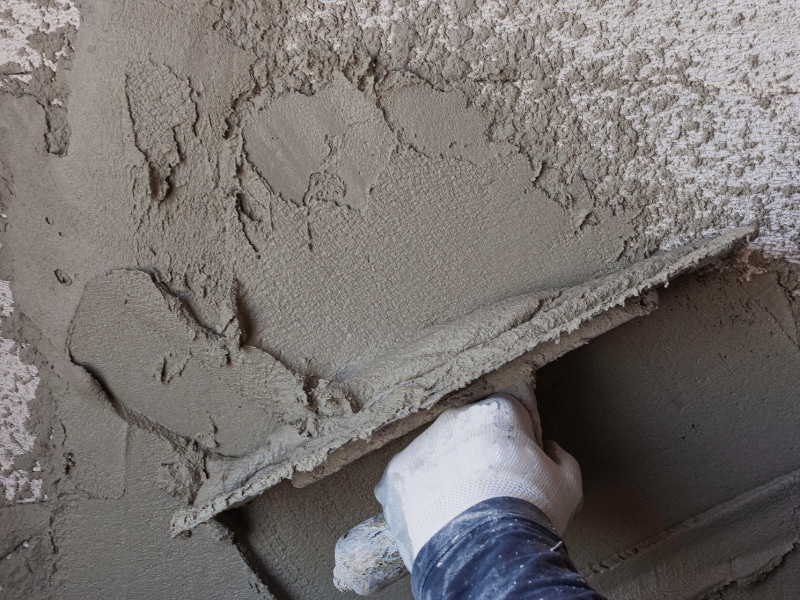
- Timing the application ensures each coat partially cures before the next, reducing surface tension and cracks.
- Clean, quality tools allow for precision edging and consistent smoothing across large areas.
- Using control joints in large wall areas allows flexibility and avoids random cracking.
- Finishing the surface with floats or sponges gives texture control for aesthetic uniformity.
If you’re wondering what type of finish to go for, consider choosing the render finish that lasts the longest, especially in areas exposed to sun or rain year-round.
What render finishes provide both style and resilience?
You’ve got plenty of choices when it comes to render finishes—but not all are created equal. Some are easy on the eye, but a nightmare to maintain. Others hold up well but look dull. The trick is finding a finish that hits both marks: visual appeal and durability. Here are the render finishes that balance style with toughness:
- Acrylic finishes provide flexible, crack-resistant surfaces in a wide range of textures and colours.
- Bagged finishes give a rustic, natural look and can be recoated easily over time.
- Textured cement renders are more breathable and handle Australian climates particularly well.
- Coloured through-renders reduce the need for paint, lowering long-term upkeep and water damage risk.
| Render Finish | Visual Appeal | Resilience | Notable Benefit |
| Acrylic | Available in many colours and textures | Flexible and crack-resistant | Long-lasting with minimal maintenance |
| Bagged | Rustic and natural look | Easy to recoat over time | Ages gracefully; can refresh appearance |
| Textured cement | Subtle, earthy textures | Breathable and climate-tolerant | Performs well in Australian conditions |
| Coloured through-render | Consistent colour without painting | Reduces water damage risk | Low maintenance and weather-resistant |
If you’re after both style and resilience, concrete render finishes can give your home a clean, modern look that stands up to harsh conditions.
Final thoughts on ensuring strong and lasting exterior renders
Rendering’s not just a finishing touch—it’s protection. It keeps the weather out, holds the structure together, and defines your property’s look. But only if it’s done right. From proper prep to careful application, every stage has to count. If you want work that holds up for years—not just a quick fix—you can explore how Jims Rendering Sydney delivers durable rendering solutions. what lasts.