A hairline crack snaking across a rendered wall rarely feels urgent. Add a little filler, smooth it off, splash on some touch-up paint, and you are done, right? Sometimes, yes. Other times, that quick patch hides early moisture damage, movement in the substrate or a faulty previous render mix that will keep failing until the root cause is fixed. In Sydney’s climate, where blistering summer heat, sudden downpours and salty coastal air constantly stress exterior finishes, the difference between a cosmetic band-aid and a durable repair can be the difference between weekend maintenance and large-scale remedial work later.
Before you pull out the gap sealer, this guide walks through what a DIY patch can (and cannot) achieve, the investigative steps a professional renderer takes, and how to decide which route makes sense for your situation. Along the way, we will cover the early warning signs that suggest deeper problems, common mistakes to avoid, and why a thorough texture solution, such as our texture coating services, may be recommended once the underlying cause is addressed.
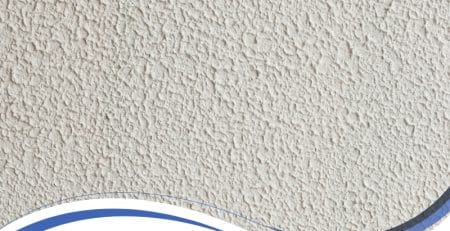
Why Small Cracks Appear in Rendered Walls
Sydney homes cope with a mix of conditions that can stress render layers. Understanding the cause helps you know whether a DIY cosmetic fix is enough.
Thermal movement and rapid temperature swings
On hot January afternoons west of Parramatta, a wall surface can exceed 50 °C, then cool rapidly when a southerly rolls through. That expansion-contraction cycle encourages tiny fractures, especially in older cement-heavy mixes with little flexibility.
Moisture cycling and wind-driven rain
Along the coastal suburbs from Bondi to Cronulla, salt-laden moisture seeps into any micro-opening, expands when temperatures drop, and widens existing hairlines. If the render is no longer fully sealed, damp patches behind the surface will hasten delamination.
Building movement and settling
A new extension, underpinning repair or even heavy traffic vibrations on main roads can shift the substrate. Render is only as stable as the wall beneath; cracks often telegraph underlying brick or block movement.
Material compatibility issues
Mixing acrylic top coats with an older cement render base, or patching with a different product, can create tension at the join and new cracks within months.
Understanding which of these forces is at play is step one. Professionals run moisture checks, tap-test for hollow spots and assess substrate movement before they even think about filling a gap.
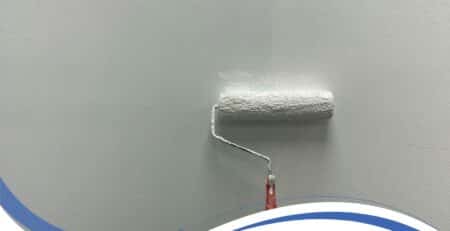
What a Typical DIY Patch Involves (and Often Skips)
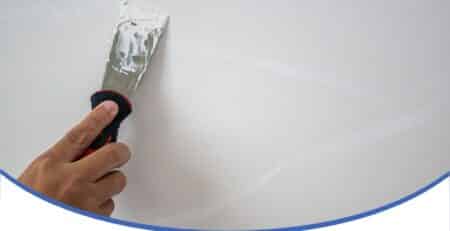
Many hardware store kits promise a “quick fix” for render cracks. The instructions usually include:
- Clean the crack with a brush.
- Apply filler compound.
- Feather the edges with a trowel or putty knife.
- Let it dry and sand flush.
- Paint over the repair.
That process can work on purely cosmetic hairlines. Problems arise when invisible factors lurk underneath. Here is what a weekend warrior might miss:
• Hidden moisture seeps that keep the area damp, causing the filler to fail.
• Debonded render around the crack that sounds hollow but has not fallen yet.
• Fine “spider-web” cracks radiating further across the wall under fresh paint.
• Incompatible filler that is harder or softer than the original render, creating new stress points.
• Lack of UV-stable top coat, meaning the patch fades faster than the rest of the wall.
How Professionals Approach Small Render Cracks
Licensed renderers treat a hairline not as a single problem but as a symptom. A typical site visit might include:
- Visual inspection under natural and raking light to spot radiating lines.
- Gentle tapping to locate hollow or drummy areas ready to debond.
- Moisture meter readings to identify damp ingress.
- Check of downpipes, flashings and weep holes for contributing leaks.
- Assessment of previous repairs and render layers for compatibility.
- Recommendation of a matching repair mortar or flexible acrylic treatment.
- Seamless blending of texture so the patch is undetectable.
- Protective coating or full-wall texture refurbishment where required.
The result is a repair that deals with the source problem and restores the aesthetic finish in one go.
DIY vs Professional: Side-by-Side Comparison
The table below summarises key differences you can weigh up before opening the tool kit.
| Aspect | DIY Repair |
Professional Repair
|
| Investigation Depth | Visual check only, limited tools |
Moisture, hollowness and substrate movement tests
|
| Material Selection | One-size-fits-all filler from hardware store |
Product matched to existing render composition and flexibility
|
| Texture Matching | Feathered by eye, may leave a visible “halo” |
Blended finish, colour and sand grade matched
|
| Longevity | 6–24 months if underlying issue minor |
5–15 years depending on wall condition and coating
|
| Risk of Recurrence | Higher if moisture or movement unaddressed |
Lower due to root-cause treatment
|
| Safety Factors | Working at heights without scaffolding or harness, limited PPE |
Trained crew with height safety compliance, dust control, respirators
|
| Cost Outlay | Low upfront, potential repeat spend later |
Higher upfront, but often a one-time fix
|
When it makes sense Purely cosmetic hairline on a stable, dry wall Cracks near windows, recurring lines, hollow render, damp signs, large areas
Red Flags That Mean “Call a Pro”
Even if you are comfortable with filler and paint, certain signs suggest professional assessment is safer:
- Cracks continue to lengthen or widen over a few months.
• Multiple hairlines cluster around window lintels or door frames.
• The wall sounds hollow when tapped beside the crack.
• Efflorescence (white salt) appears around the gap.
• Internal paint is bubbling on the opposite side of the wall.
• You spot rust streaks coming from embedded mesh or nails.
• The home is on the coast or in a bushfire-prone zone where coating systems must meet compliance requirements.
In these cases, a licensed renderer will identify whether targeted patching works or if a broader texture solution will seal and protect the façade.
Common Mistakes Homeowners Make When Patching Cracks
- Skipping proper surface preparation
Dust or loose render stops the filler from bonding and leads to early failure.
- Using rigid cement filler on a flexible acrylic render
Different expansion rates create new cracks around the patch.
- Painting before full cure
Moisture trapped inside the filler can bubble paint or stain the finish.
- Overfilling and heavy sanding
Creates shallow depressions that collect water and grime.
- Ignoring moisture sources
A leaking gutter above the crack means any patch will fail again.
- Not feathering the top coat far enough
Colour inconsistencies stand out, especially on north-facing walls that cop UV fade.
Questions to Guide Your Decision
Thinking it through first usually saves time and money. Ask yourself:
• Has this crack come back after a previous repair?
• Is the wall exposed to driving rain or direct sun most of the day?
• Can I safely reach the area with proper ladders or scaffolds?
• Do I know what render type is on the wall (cement, acrylic, polymer modified)?
• Am I confident the area behind the render is dry and sound?
• How important is a perfect colour and texture match to the property’s value?
If more than one answer gives you pause, professional input is prudent. For a step-by-step look at materials and technique, see our detailed guide on how to fix hairline cracks in rendered walls after you finish this article.
Sydney-Specific Considerations That Affect Small Crack Repairs
Coastal suburbs
Salt crystals accelerate coating breakdown. Professionals may recommend salt-resistant primers before re-texture.
Inner-west heritage homes
Older lime-based renders need breathable patch materials, not hard cement fillers, to avoid trapped moisture. Check council heritage guidelines before altering façades.
Western Sydney heat zones
Thermal shock is harsher. Flexible acrylic top coats help absorb expansion around repaired areas.
Bushfire zones (BAL ratings)
Exterior finishes must meet fire-resistance specs. A licenced renderer familiar with BAL compliance ensures any recoating continues to meet regulations.
What Happens If You Ignore Tiny Cracks?
Leaving a small gap for “another day” rarely ends the story. Moisture can seep behind the render, corrode metal flashings, and loosen larger sections. In worst-case scenarios, render sheets fall, posing a safety hazard and exposing structural bricks to the weather. Many insurance policies require reasonable maintenance; a neglected wall might reduce claim success if water damage spreads internally.
Decision-Making Flow: Monitor, DIY or Professional?
- Monitor
– Crack ≤ 0.3 mm, stable for 6 months, no damp signs.
– Record date and width, recheck quarterly. - DIY patch
– Stable, dry hairline.
– You can identify render type (cement or acrylic) and buy a matching flexible filler.
– Wall section is at ground level with safe access. - Professional repair
– Any widening, damp marks, hollow sound, cluster of cracks, or location above 2 m height.
– Heritage façade, BAL zone, or you plan to sell and need an invisible repair.
Industry Standards and Compliance
Under the NSW Home Building Act, render work valued over $5000 (labour and materials combined) requires a contractor to hold the appropriate licence class. Even smaller jobs should follow guidelines in AS 3700 (Masonry Structures) and AS 4773 (Masonry in small buildings). When you engage a contractor, confirm their credentials against the NSW Fair Trading licence requirements to ensure compliance and insurance coverage.
FAQs
1. Can I just fill a hairline crack with exterior paint?
Very fine surface crazing can disappear under a high-build paint, but that only works if the render beneath is sound and completely dry. If the crack reopens within weeks, you will need a flexible filler and potentially a render skim.
2. How wide can a render crack be before it needs a rebuild?
Width alone is not the only factor. A 1 mm static crack may be fine to patch, while a 0.5 mm gap that is actively widening signals movement. Professional assessment focuses on change over time and the underlying cause, not just the width.
3. Does acrylic render crack less than traditional cement render?
Acrylic systems are generally more flexible, so they tend to resist hairlines better. However, poor substrate preparation or extreme thermal stress can still create flaws. Flexibility is not a cure-all.
4. Will home insurance cover render crack repairs?
Policies differ. Most view gradual wear and tear as the owner’s responsibility, but some may cover sudden impact or storm damage that initiates cracking. Check your PDS and keep maintenance records.
5. How long should a professional small-crack repair last?
With the right diagnosis and matching materials, a small pro patch blended into an intact render system can last 5–15 years. Durability depends on wall movement, exposure, and ongoing maintenance like sealant checks and repainting cycles.
Final Thoughts
Hairline render cracks look harmless, but they can hint at moisture seepage, substrate movement or material incompatibility. A quick DIY patch is tempting, and sometimes it is all that is needed. However, skipping diagnostics or using mismatched products can see the same crack — or several new ones — reappear before the next summer storm. Taking a moment to weigh the hidden risks, local Sydney conditions and compliance requirements will help you decide whether monitoring, a DIY filler, or a professional render repair is the wiser move. If the cracks keep returning or you suspect a deeper issue, a licenced renderer can pinpoint the cause and, if needed, recommend a protective texture coating that seals the surface for years rather than months.